Browse Search Popular Register Upload Rules User list Login:
Search:
Heighway Dragoncurve Generator

Image:
screenshot of the scene

Author: FRA32

Group: Technical

Filesize: 356.12 kB

Date added: 2016-01-01

Rating: 6.1

Downloads: 2296

Views: 513

Comments: 18

Ratings: 3

Times favored: 1

Made with: Algodoo v2.1.0

Tags:

Scene tag

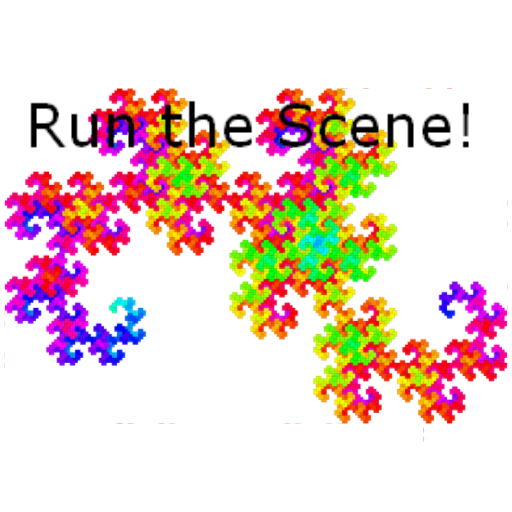
This scene shows how the so called "Heighway Dragoncurve" is generated. It is actually a fairly simple process that you could repeat on a piece of paper if you had enough patience and exact tools:

Take an initial line
replace the line with 2 new lines, forming a right angle
replace these lines once again with 2 lines each, whereas the first pair has the tip outwards, and the second one inwards.
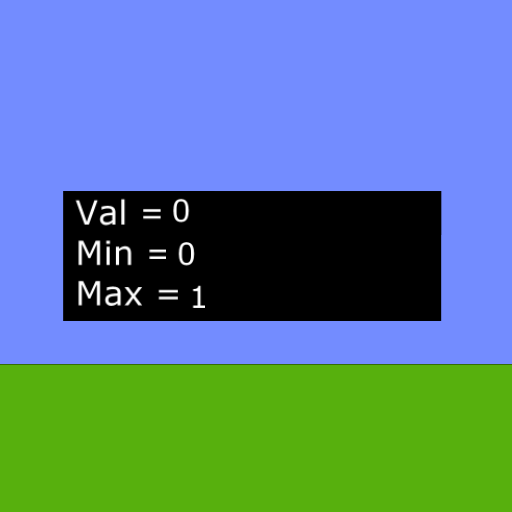
Repeat the prior step multiple times(here 11 times) while remembering to make the tips go inwards and outwards alternately.

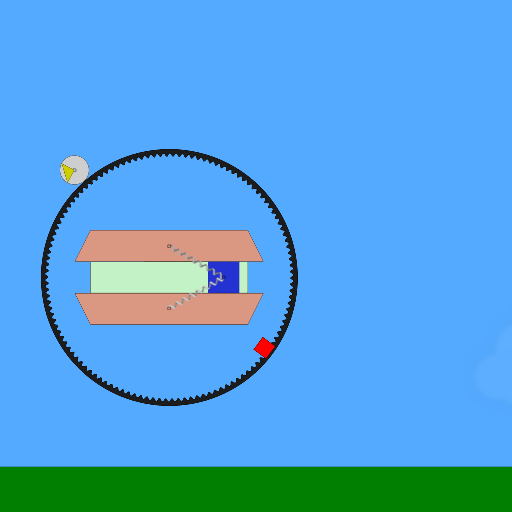
The scene automatically stops when the figure is done, so keep it running, even if it laggs, until it stops itself.

Fun fact: The final shape is made of 2^11, or 2048 boxes, and is recursive(parts of the shape resemble the whole object). If you want to increase the amount of iterations, multiply the width by the squareroot of 2, or 2^0.5. Multiplying by 2 increases the iterations by 2, and quadruples the amount of shapes when finishing, so be careful about what your System can handle

And for those who think they need some cool non-camp-community, join our Group The Algodoo Building Community(ABC)
Last edited at 2016/07/03 21:50:53 by FRA32
Please log in to rate this scene
edit
Similar scenes
Title: My first incremental game v1.1.2
Rating: 5
Filesize: 22.13 kB
Downloads: 646
Comments: 2
Ratings: 1
Date added: 2021/03/05 08:26:57
Made with: Algodoo v2.1.0
Rating: rated 5
download
Title: Free Energy Generator
Rating: 4.5
Filesize: 164.89 kB
Downloads: 3503
Comments: 10
Ratings: 2
Date added: 2013/04/23 16:02:26
Made with: Algodoo v2.1.0
Rating: rated 4.5
download
Title: CA Bunker Generator
Rating: 5
Filesize: 295.84 kB
Downloads: 308
Comments: 0
Ratings: 1
Date added: 2015/11/27 17:37:28
Made with: Algodoo v2.1.0
Rating: rated 5
download
Title: Generator
Rating: 5
Filesize: 66.61 kB
Downloads: 1076
Comments: 0
Ratings: 1
Date added: 2011/12/04 22:23:38
Made with: Phun
Rating: rated 5
download
Title: My first incremental game v1.1.1
Rating: 5
Filesize: 18.27 kB
Downloads: 333
Comments: 1
Ratings: 1
Date added: 2021/03/03 08:45:59
Made with: Algodoo v2.1.0
Rating: rated 5
download
Title: Gear Generator III
Rating: 6.8182
Filesize: 253.76 kB
Downloads: 536
Comments: 0
Ratings: 5
Date added: 2018/12/16 14:50:36
Made with: Algodoo v2.1.0
Rating: rated 6.8
download
Interesting! I wonder how do make this,though :tup:
Simply rightclick any of the figures at any stage and look at the script window. They all use the exact same code, and are basically resized duplicates of each other. The maths were quite messy once again, but it was worth the work xD.

Basically, what happens is it first gets the 2 new angles of the future 2 shapes by adding 45 degree to them(/180*math.pi turns it into radiants), and then, depending on _dir, adds/substracts math.pi to flip it the other way round.
Then it gets the new size by multiplying the length with the square root of 2 and then dividing by 2 since x*2^0.5 = the diagonal of the corresponding square, and /2 = half that diagonal.
The complicated part was the 2 pos of the new rectangles, since it messed alot with the angles. What happens now is basically, it takes quarter the diagonal of the "line" squared, and then multiplies it with an modified rotation set to spin the point with the angle of the new "line".
After that all that happens is the original box dies, and spawns 2 new boxes inheriting its script and the calculated values, where 1 box has _dir = 1, and the other _dir = 0, so that one has its "tip" upwards after splitting again, and the other downwards.
What happened out of coincidence is that after 11 iterations, the "lines" have turned into squares xD
Very interesting scene!

I did some experimenting with the values in the initial line, and I found that when I made the timeToLive values slightly different between the two "scene.addbox" scripts (such as 0.1 and 0.11) then the resulting image becomes something that looks "fractal" (although it isn't truly fractal). Unfortunately, it also lags very badly after a short time period and I have to manually stop the simulation when it gets real bad.

I also deleted the "color = e.this.color" in both scene.addbox scripts in order to make a multi-color pattern.

Try it!
Last edited at 2016/01/01 16:27:50 by Xray
Yeah, I tried a little tweak where the left-hand-piece has a smaller time-to-live than the right-hand-piece, resulting in an flowing iteration. If you watch the generation then, you see what piece is always left handet, and what always right.
Btw, the scene has a hidden object that stops the whole process after 12 seconds. I will upload a tweaked version of the scene where it automatically pauses and shows the time it took for each piece to generate. check it out.
OOOooooooh! Pretty colors! :tup:
How do you make it stop after 12 seconds?
It used to be a hidden figure that I placed in the scene, turning sim.running to false if sim.time > 12. Now it does not halt anymore, and instead stops the splitting process of squares that are small enough
A real Fractal! =) WOW !!
Yup. My mandelbrot and julia scenes also are fractals(mandelbrot is semi-fractal, since it's surface has slight differences as you zoom in, and the satelites are hybrids of the original mandelbrot and the area they are located in) If you suggest me more fractals, I can try making them in algodoo
Go On!! =) You are a genius!
FRA32 - how 'bout making a Koch snowflake? I tried doing it myself by translating the code from Java script, but the resulting snowflake looks more like a convoluted bowl of spaghetti! :lol:
Nice work. :tup: :tup:
Sure, I'm gonna do that.
...and he DID it!!!! :o
I tried to a certain pattern but it crashed my computer... (It was a triangle one but its hard to describe. You start with a triangle, and then cut it into 4. Erase the center one. Then you do it again with the triangles and continue to do it.
Eh, you mean the sierpinski triangle. First of all it's a polygon, so you need to be carefull about the vertices, and second of all: Remember the limitting condition, never let it go endlessly, algodoo does not have endless RAM(I can only allocate 1.5GB)
seeing this makes me feel like you played algodo for: 38977682307542677468579897643749062576854926790287­9675640397580 years! but that is more then a lifetime and the univrse never lived that long. I want to know how it works. I see you comment yourself to reply users. to that to mine please. mind you I am not good at script.
Okay, of course I can explain, because if you ask, it means you are itnerrested, and if I answer, you may get a step further to really cool scenes:lol:

So it works basically like this(you can do it on a piece of paper too btw.):

Draw a line of any length, but it should by a multiple of 2(best would be if you take a length of 1,2,4,8,16,32,64 etc.). Then replace this line by 2 new lines that form a tip on top of it(as if you would place a right triangle on it).

In the script this happens by adding and subtracting 45° from the lines angle, while multiplying the length of the line with 2^0.5 (the square root of 2, the number which, when multiplied by itself, turns into 2). Then using a twisted algorythm, the new positions of the 2 lines are calculated(I imagine a point floating over the line, and then turn it by 45° in both directions).

After that, repeat the process on the new 2 lines, with following adjustment:

The first line has it's tip showing "outwards" or to the top left, the other one "inwards", or showing to the bottom left. Repeat the same thing over and over again until the lines are to short to be precice. Remember to alternate between "outwards" and "inwards" tips, else you may get another fractal that is totally different, or end up with line gibberish. If you want to know if you messed up, watch carefully if any of the lines are double drawn(drawing the same line 2 times). If yes, you made a mistake, since all lines occupy a space just once, and exactly once.

I even did this on a piece of paper myself, starting with a length of 16cm, and going up to a length of 0.5cm, which equals 10 iterations. Right now I do a larger scale, starting from 32cm, and ending in 0.5 cm, which is 12 iterations, and only fits if you glue together 4 A4 Sheets to 1 A2 Sheet. Takes quite some time, and I only work on it when I have nothing to do, but the shape is growing.

Here's a tip if you plan to do a large scale of the fractal: take 1 sheet of paper, and make a small version of the fractal(with an initial length of 8cm for example), continue until you reached 0.5cm, and then take that shape, and redraw it on your final sheet so that it's touching 1 of the 2 end points of your initial line. Then spin it following this rule: For every multiple of 2 that the initial line has to the initial line of your small shape, spin it by 90° to the left, starting from a pose so that the curve goes from the left to the right. So if the small curve is 8cm, and the large one 32, its 2 multiple of 2 (8*2*2 = 32), so I spin it by 180° so that the curve shows to the left. Then you do this: Take the drawn curve, and then draw a copy in such a way, that the originals and the copys 2nd end touch, and that the copy is rotated by 90° to the left, like this: (~ is the original, | is the copy)

|~

you will see the resulting shape looking like a larger scale of your previous figure. Now copy this whole figure using the same technique(rotating the copy on the second end point). It will look like this afterwards(a line represents to original miniature curve):

_|
|_


Heres a fun fact: You can predict the "turns" of the curve using this algorythm:

Add a right turn to your "chain"

R

For each "round", add a new R, read the previous chain backwards, and replace every L with R. Add the result. In this case:

RRL

R was the previous chain, the 2nd R is the initial R added in this round, and the L is the inversion of the previous R.
Next round:

RRLRRLL

RRL was previous chain, R is new R, RLL is inversion of previous chain read backwards(R1 R2 L3 -> R3 L2 L1)
If you continue this multiple times, you get this chain:

RRLRRLLRRRLLRLLRRRLRRLLLRRLLRLLRRRLRRLLRRR­LLRLLLRRLRRLLLRRLLRLL

Now draw a short line(0.5cm for example), and then, for every R, add a new line on it that takes a right turn, and for every L, add a line that takes a left turn. You will see how you end up with the curve again.